<< Articles
Start using POSEMANIACS poses with Clip Studio Paint (From Ver 3.0)!
From Clip Studio Paint Ver.3.0 or later, you can import poses from POSEMANIACS into 3D drawing figures or 3D characters in Clip Studio Paint.
*This function can only be used in Studio Mode on the tablet and smartphone versions of Clip Studio Paint.
If you don't have Clip Studio Paint, you can download Version 3.0 or later here.
https://www.clipstudio.net/en/dl/
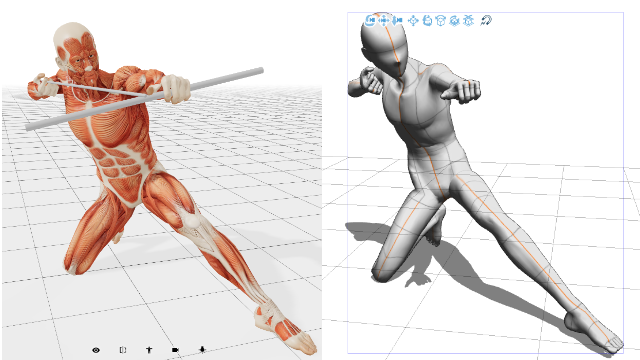
You can apply poses from POSEMANIACS to a 3D drawing figure whose body shape has been adjusted to match your own design, or adjust imported poses to suit the situation.
What is Clip Studio Paint?
Clip Studio Paint is an app used for the creation of illustrations, manga, webtoons, and animations by over 35 million people globally.(*)
It is compatible with iPad, Android, Windows, macOS, Chromebook, iPhone, and Android phones.
The app offers a smooth drawing experience with a wide range of functions and is used by a large and diverse user base, ranging from beginners to professional creators such as manga and comic artists, illustrators, and animators from all over the world. Many of its features incorporate 3D technology to assist your artistic vision. With 3D drawing figures and head models, you can create references for specific poses and facial expressions. Use 3D primitives to assist you in creating rough setups of the composition you have in mind.
*This includes trial version users and installations on iPad, iPhone, Galaxy, Android, and Chromebook versions.
1. Open POSEMANIACS
Open from Clip Studio Paint
There are three ways to open POSEMANIACS from Clip Studio Paint: through the File menu, the Sub Tool Detail palette, and the Object launcher.
When you open POSEMANIACS using either method, your browser will start and you will be redirected to the pose list page on the POSEMANIACS site.
- File Menu
With the canvas open, select the File menu > Import > 3D pose (Posemaniacs).
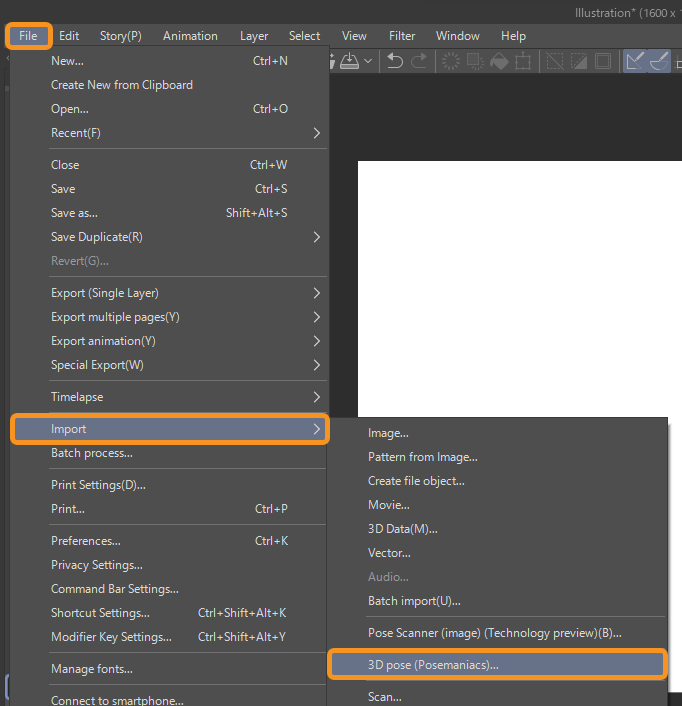
- Sub Tool Detail Palette
With the 3D drawing figure or 3D character material placed on the canvas, select the POSEMANIACS icon from the Sub Tool Detail palette > Pose > Pose.
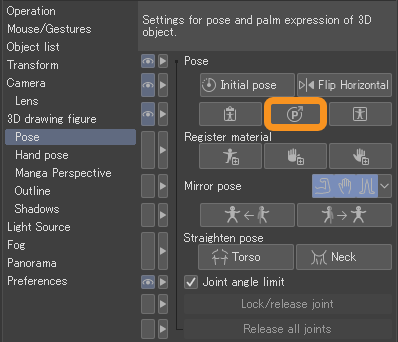
- Object Launcher
With the 3D drawing figure or 3D character material placed on the canvas, select 3D pose (Posemaniacs) from the Object launcher.
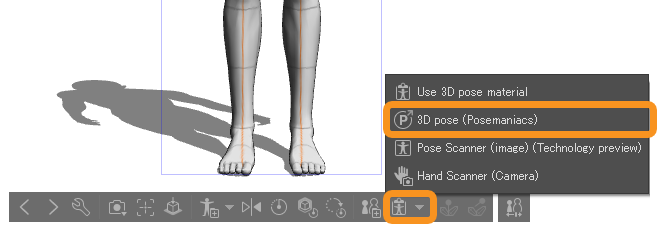
Open from browser
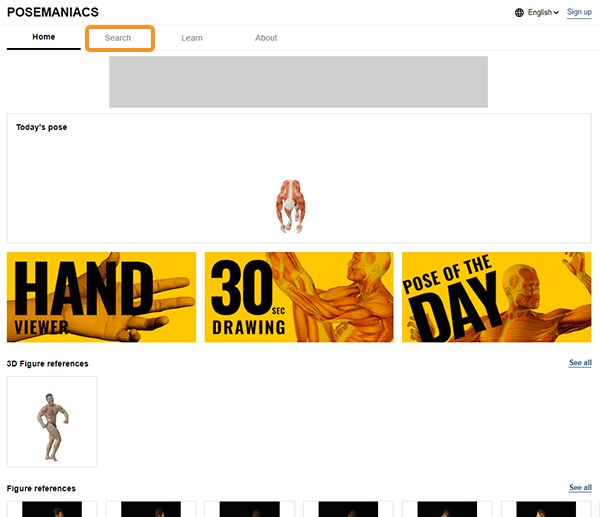
Open your browser and access POSEMANIACS. Click “Search” to view the available poses.
https://www.posemaniacs.com/
2. Select a pose on POSEMANIACS
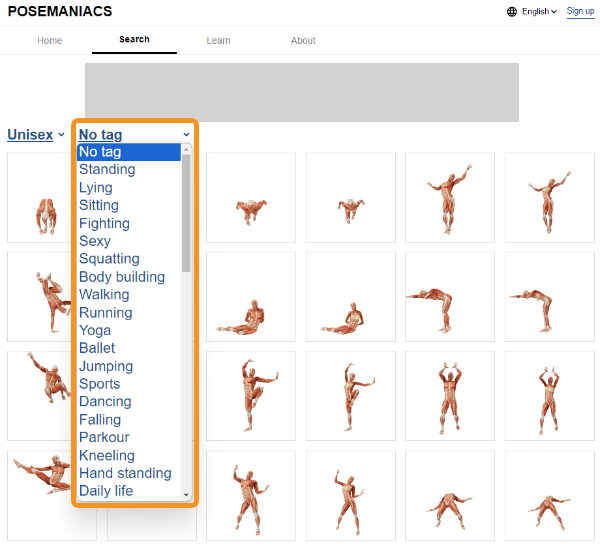
A list of poses is displayed on the “Search” page of the POSEMANIACS website. You can also filter poses by tag by clicking on “No tag”.
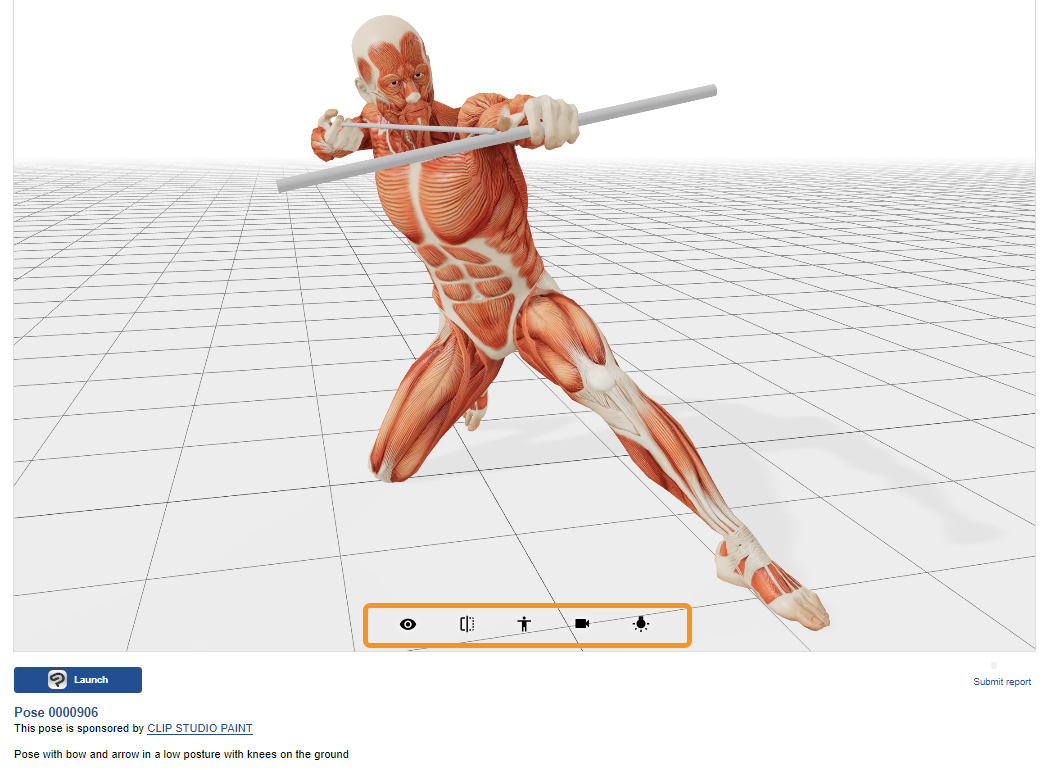
When you select a pose from the list, a new page will appear where you can adjust the pose to your liking.
You can adjust the model's angle, direction, and more. from the icons at the model's feet.
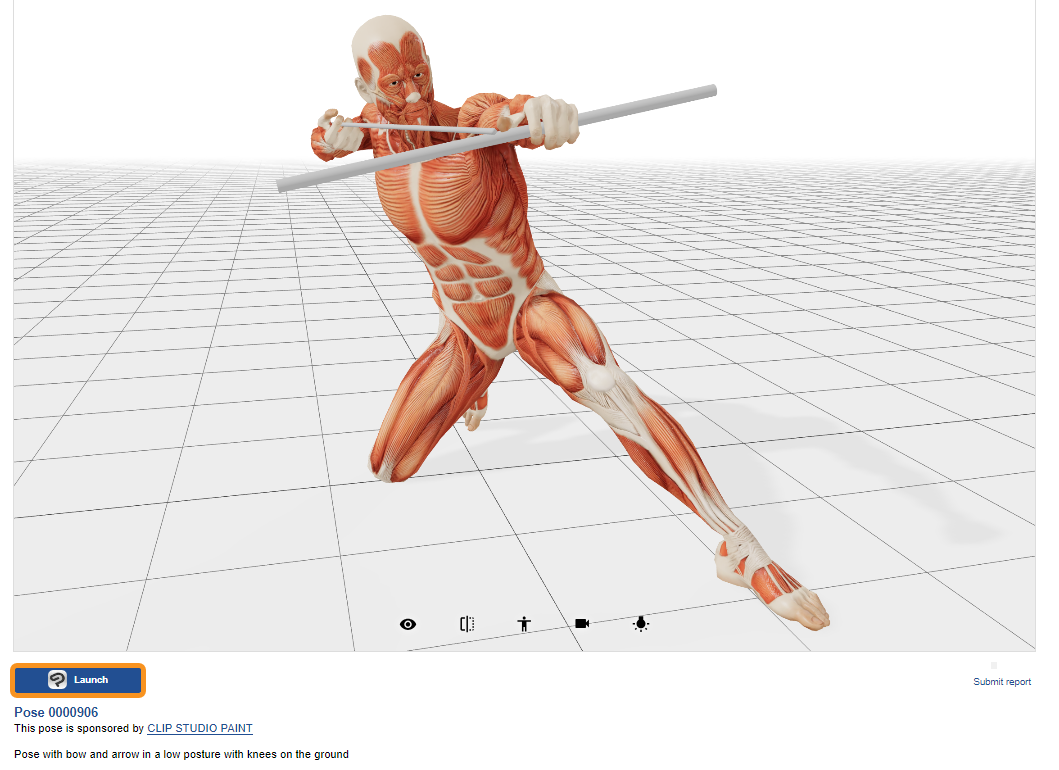
Once you have decided on the pose and angle, press the “open Clip Studio Paint” button at the bottom right to open Clip Studio Paint.
3. Import into Clip Studio Paint
When opening Clip Studio Paint, a dialog will appear if there are no 3D drawing figures or characters on the canvas, allowing you to select the 3D drawing figure you want to apply the pose to.
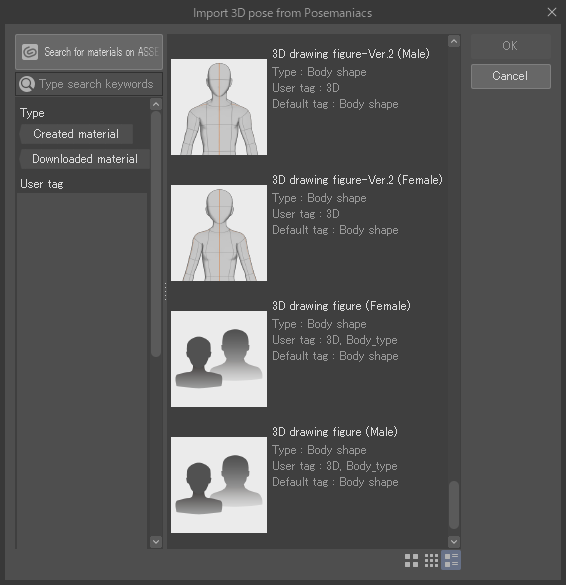
3D drawing figures are 3D materials that can be used to create difficult poses and angles when aiming to draw people. You can choose from the following four types.
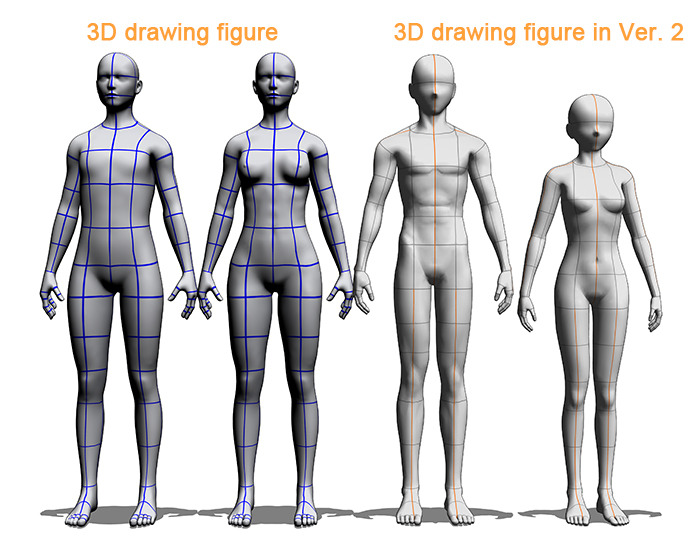
When you choose a 3D drawing figure, its pose will closely reflect the angle displayed on POSEMANIACS.
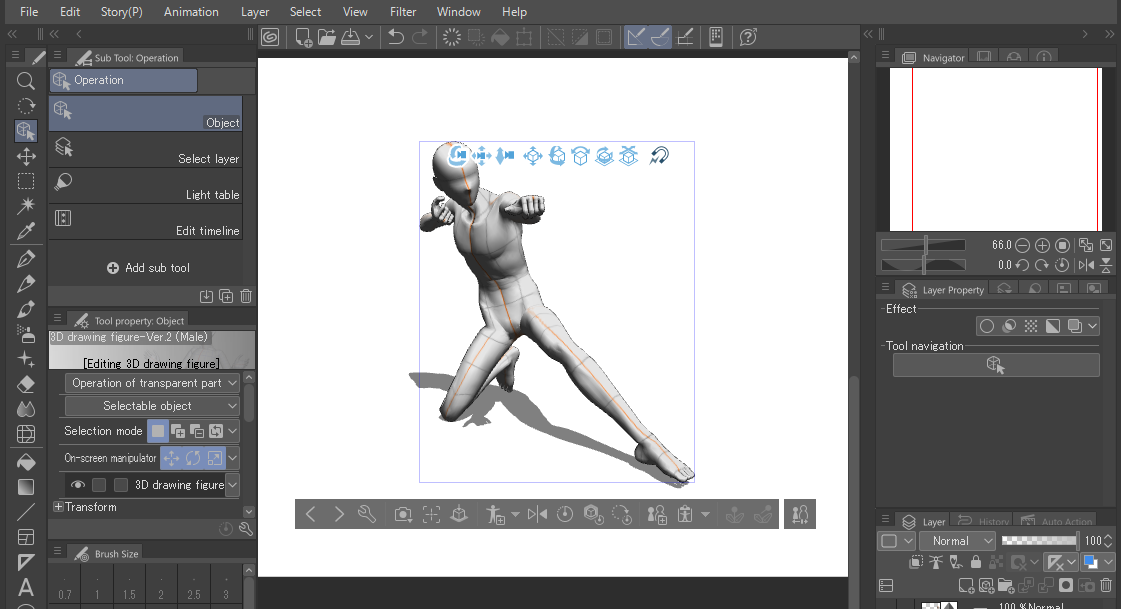
The pose of POSEMANIACS will be applied to the 3D drawing figure or 3D character material placed on the canvas.
- If multiple 3D drawing figures are placed on the canvas, the pose will be applied only to the selected figure.
- If you want to use a 3D character, it will not be displayed on the body material selection screen. Therefore, please place it on the canvas beforehand and select the pose with POSEMANIACS.
- The texture of human muscles, accessories such as sticks, and lighting used in POSEMANIACS will not be reflected in Clip Studio Paint.
4. Adjust the pose using Clip Studio Paint
Models using POSEMANIACS poses can be freely adjusted in Clip Studio Paint.
The pose will vary depending on the length of the model's limbs and the bone structure, so if the positions of the limbs do not match, try adjusting them individually.

For more information on working with poses, check out this tutorial.
https://tips.clip-studio.com/ja-jp/articles/786
You can adjust the gender and body shape of the model, even after loading the pose, by using the Tool Property palette and Sub Tool Details palette, just like you would with regular 3D drawing figures.
Try adjusting the body type to match the model.

Check out this guide for more information on how to adjust the body shape of 3D drawing figures.
https://tips.clip-studio.com/ja-jp/articles/785
To adjust the “Viewing angle” set in POSEMANIACS in Clip Studio Paint, select the Tool Property palette > Angle > Perspective.
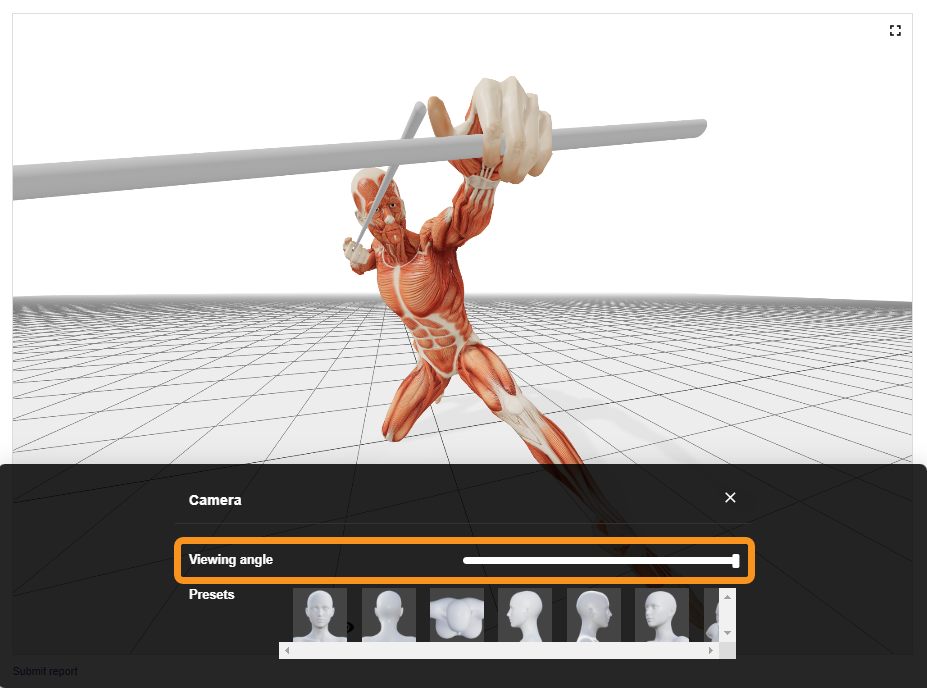
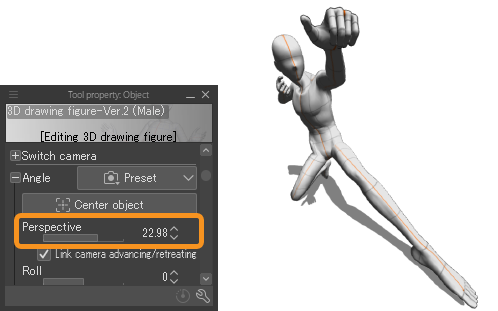
Reset the display in Clip Studio Paint to its initial state by setting the perspective value to 4.72.
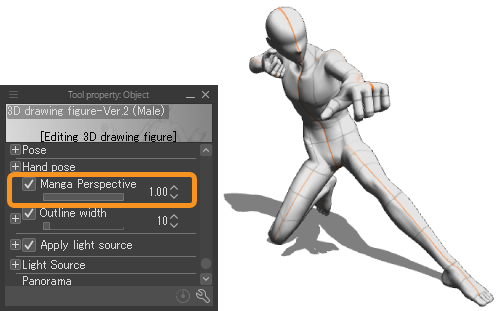
We also recommend adjusting the pose using Manga Perspective in the Tool Property palette, in Clip Studio Paint.
5. About models on which POSEMANIACS poses can be used
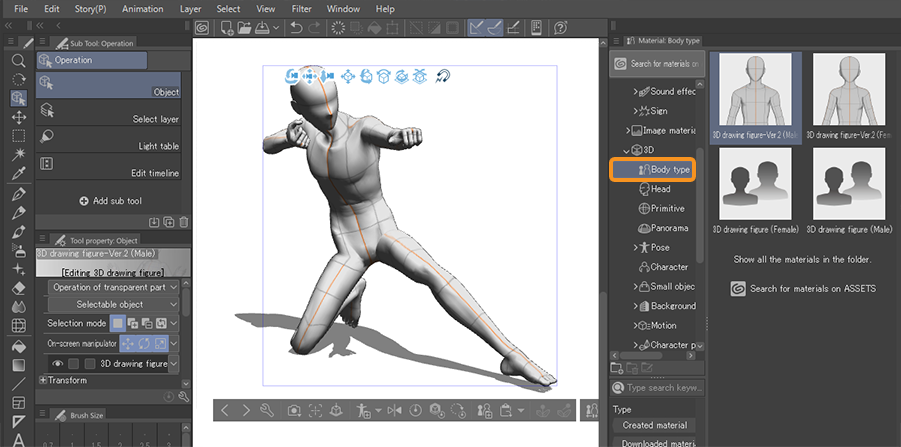
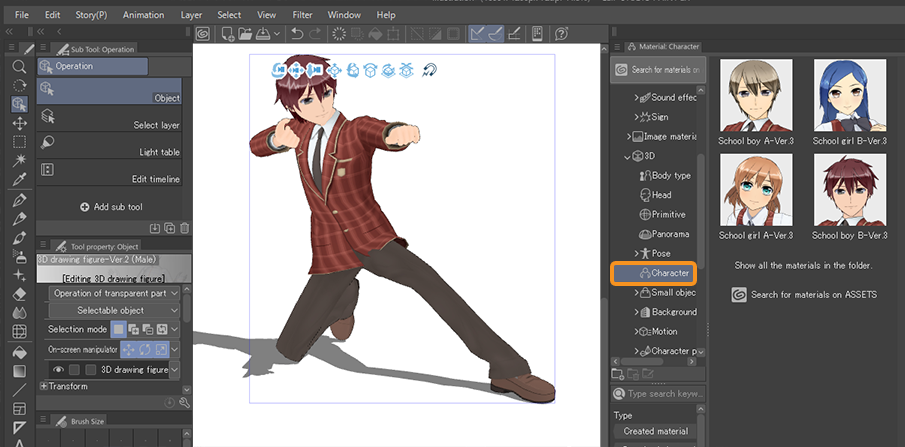
3D drawing figure and 3D character materials can be selected from the Material palette as 3D Body type, or 3D Character.
Select the model you want to use and drag and drop it onto the canvas to place it on the canvas.
- 3D drawing figure (Body shape material) initially included in the Material palette
- 3D character materials initially included in the Material palette
You can also use body shape material and 3D character materials downloaded from Clip Studio Assets.
- 3D character materials downloaded from ASSETS
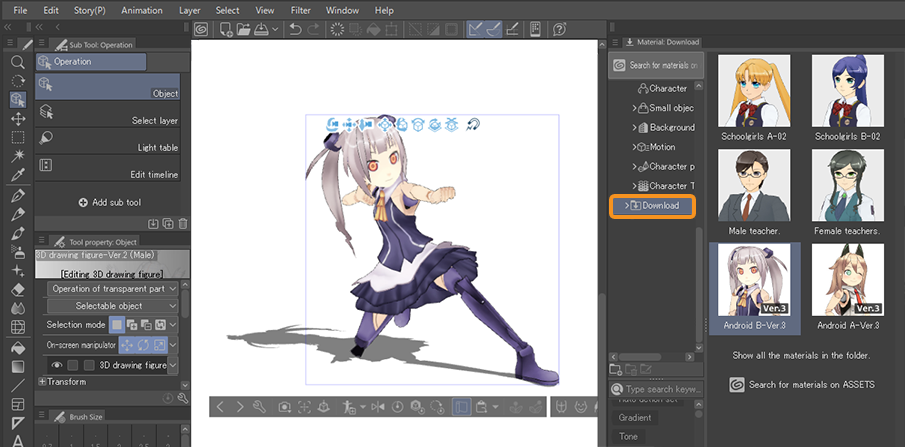
Poses can also be applied to VRM format files imported into CLIP STUDIO PAINT.
For more information on importing VRM, please check this guide.
https://tips.clip-studio.com/en-us/articles/5814#9e25efb0